Time to show off your woven patches: here’s how to sew on a patch by hand
Patches are a great way to add personality to your clothing. They can customize a piece or simply hide imperfections like stains or holes. You don't need a sewing machine to stitch a patch on yourself, but you may not feel confident in your ability to stitch by hand. If that's the case, you're not alone. 23 percent of adults do not feel confident taking on a task as simple as stitching a button onto their clothes. If you're wondering how to sew on a patch by hand, you can rest assured. The process is not nearly as complicated as it seems.
Even if your patch is a unique shape, it can be sewn on in a matter of minutes, using basic household items.
By following these simple steps, even the most inexperienced DIY'ers will successfully add a patch to their clothing. Read on to learn how you can confidently fasten a patch to your clothes.
How to sew on a patch by hand
There are several types of stitches to choose from when you're fastening a patch to your clothing, but you will require the same items to complete the task, regardless of which style of stitch you choose.
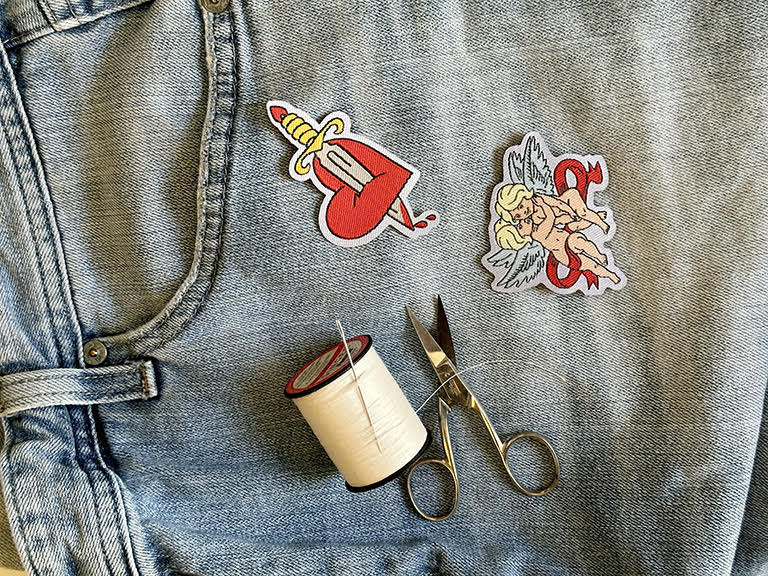
Before you begin, make sure you have the following items on hand:
- Surface Fabric/Article of Clothing
- Patch
- Iron
- Sewing Kit (Thread and Needles)
- Sewing Pins
- Scissors
Determine the placement of your patch
Sometimes a patch will cover up a tear or stain in the fabric. Or you may be stitching a patch to a predetermined location on a uniform. You likely already know where the patch will be stitched in these cases.
In other cases, you must determine the patch's best placement. While it's important that your patch is visible, it's best to avoid placing it too close to the seams of your clothing.
You should also consider the fabric you're stitching the patch onto. Durable fabrics like denim are best for patches because they are thick and secure.
Once you've determined the placement of your patch, it is time to prepare.
Preparing to stitch
Before you thread the needle, make sure the fabric is ready for its patch. You can find out more about the fabric of your clothing by reading its label.
Wash, dry, and iron your clothing before sewing on your patch. This will prevent any unnecessary creasing and ensure the patch sits flat on the fabric.
If you are covering up a tear, be sure to cut and remove any loose threads around the site of the hole.
Once you have decided where to place your patch, secure it on the fabric using sewing pins.
Preparing the needle and thread
Selecting the right needle to stitch with will make the sewing process easier. You should first consider the density of the patch. For example, embroidered patches will be more difficult to thread than woven ribbons.
Consider how thick the material of the clothing is. If you're sewing patches onto jeans, you will need a thicker needle than if you're sewing a patch onto a cotton shirt. Dense fabrics require thicker needles.
When selecting your thread, it's best to select a color that blends or contrasts with the patch. But if you are sewing patches for jackets, pay attention to the material you pick. Thread works well on denim but if you're stitching a patch onto leather, you may find that fishing line is more durable.
Next, thread and knot your needle by inserting one end of the thread into the eye of the needle, and creating equal lengths on each side. Double the thread over to make it stronger. The thread should be knotted at the end where the end of the thread meets.
By doubling over the thread, it will be stronger and more durable. This will help fasten thicker patches as well. One example is when you're choosing between a woven vs. embroidered patch.
Start stitching
Insert the needle through the fabric and patch roughly 1/8" away from the edge of the patch. This distance will keep the patch flat. For a basic running stitch, move 1/4" around the perimeter of the patch, ensuring the thread is tight.
If you run out of thread at any point, simply knot the thread tight to the surface and cut any excess, then continue with a new thread. This same knot can be used when you've finished stitching your patch on as well.
Types of hand-sewn stitches
When considering how to sew on a patch by hand, there are several stitching techniques to choose from. Each stitch creates a unique look for your patch, and ultimately it's a personal preference.
Here are a few stitching styles to choose from when you're sewing a patch on your clothing.
Running stitch or basting stitch
The running stitch is a basic hand-sewn stitch, likely the most recognizable. With a running stitch, the needle is woven through the back of the fabric into the patch, then exits roughly 1/4" to the right or left.
Repeat this motion until the entire perimeter of the patch is stitched. Then it is tied off.
The basting stitch is very similar, but the 1/4" stitch increases in length, making the thread more prominent in the patch. This looks great using a contrasting thread if you want the thread to be noticed.
Backstitch
A backstitch can be used to create a continuous line with your thread.
To create a backstitch, insert the needle through the fabric and patch, then create a stitch roughly 1/4" in length. Weave the thread through so the needle has returned to the back of the patch and fabric. Then re-enter roughly 1/4" to the right and stitch back through the original hole to the left, filling any space between the stitch.
Continue this until there is one continuous line of thread around the edge of the patch.
Stem stitch
The stem stitch creates a continuous line of thread that appears twisted and polished.
To create this stitch, begin creating a running stitch but stop short of pulling the thread tight. Instead, bring the needle back through the halfway point of your stitch and pull the thread outward, away from the thread, rather than through it. Pull the stitch tight.
Continue this by re-entering where the previous stitch ended, until there is a continuous thread fastening the patch.
Herringbone stitch
The herringbone stitch creates a unique zig-zag-like pattern around the perimeter of a patch. This stitch is bold and a bit larger and works best if you would like the thread to make a statement.
Work off a top line and a baseline. Begin by threading the needle through the fabric. Then reenter the patch on a diagonal, creating a diagonal line.
Move one stitch length to the left before moving the needle down to create an equal diagonal line in the opposite direction.
This style of stitch works well on its own, but it can also be used as a part of a composite stitch if you're looking to create something more colorful and unique.
It is also common when sewing in custom woven labels.
The buttonhole stitch
A buttonhole stitch is a blanket-style stitch that creates a bolder look.
To create a buttonhole stitch, you will work with a top line and a baseline. The needle should begin by entering the baseline where you would like the rope-like look to be. Then enter through the topline to the upper right of the original stitch.
Thread the needle through the baseline, directly below the second hole, to the right of the original stitch. Make sure the needle is threading above the thread loop before pulling the stitch tight.
Other unique hand-sewn stitches
Although the stitches above are some of the most common choices for fastening a patch, the options are endless.
If you're looking for a unique stitching option, consider a variety of crocheting stitches. You may opt for a familiar stitch like the cross stitch or the satin stitch, which are both fairly straightforward.
But if you're looking for something unique, a chain stitch or feather stitch will give your patch more personality.
Whatever stitch you choose, make sure the thread doesn't distract from the overall design of the patch. It should complement your patch and be a form of self-expression.
Wear your patch with confidence
Patches are a great way to make clothing feel unique and personal. But if you're not comfortable sewing, the process of hand-stitching a patch may seem overwhelming.
If you're wondering how to sew on a patch by hand, the process is quite simple. You likely already have everything you need, and it doesn't require a lot of time.
By following the tips in this guide, you can feel confident that your patch is firmly fastened and wear it with pride. If you are looking for unique woven products or patches, we have a wide selection. Browse our styles today, or create a custom design and find a patch you love!


