How to Replace a Zipper Slider in 6 Simple Steps
Replacing a zipper slider is one of the quickest ways to save a jacket, bag, pouch, cushion cover, uniform, or gear sample that still has a perfectly usable zipper tape. In many cases, the teeth are fine and the fabric is fine. The small moving part has simply worn out, stretched, cracked, or lost its grip.
The key is knowing whether the slider is truly the problem, then matching the replacement correctly. A zipper slider is not the same thing as a zipper pull. The slider is the metal or plastic body that runs along the teeth. The pull is the tab, cord, or branded tag you hold. If the pull tab broke but the slider still opens and closes the zipper properly, you may want this guide on fixing a broken zipper pull without replacing the zipper instead.
If the slider is the issue, the repair is usually straightforward. Here is how to replace a zipper slider in six simple steps.
First, confirm the slider is the problem
Before buying parts or pulling hardware off the zipper, take a minute to inspect the zipper from end to end. Replacing a zipper slider works best when the zipper teeth, coil, tape, and stitching are still in good condition.
Common signs that the slider is the likely culprit include:
- The zipper opens behind the slider after you zip it closed.
- The slider feels loose, wobbly, cracked, or visibly spread apart.
- The slider moves but does not mesh the teeth together.
- The pull tab is attached, but the slider no longer grips the zipper chain evenly.
- The zipper teeth look straight and complete, with no missing sections.
If teeth are missing, the zipper tape is torn, the coil is separating from the fabric, or the insertion pin on a jacket zipper is damaged, a new slider may not solve the problem. In those cases, replacing the entire zipper or asking a repair professional is usually the better choice.
What you need before you start
A slider replacement does not require a large sewing kit, but having the right small tools makes the repair much cleaner. Work on a flat surface with good light, especially if you are fixing a small pouch zipper, garment zipper, or zipper on a product sample.
You will need:
- A replacement zipper slider that matches the old slider type and size.
- Needle-nose pliers for removing and crimping stops.
- End nippers or small cutting pliers if the old stop is difficult to remove.
- A seam ripper if the zipper end is covered by stitching.
- Replacement top stops, a zipper stop kit, or strong thread for a sewn stop.
- Tweezers for small slider parts or narrow zipper tape.
- Optional wax, zipper lubricant, or a graphite pencil for light sticking after the repair.
Do not start by squeezing the old slider with pliers unless you are only trying a temporary fix. Overcrimping can make the slider jam, damage the teeth, or scratch the finish. For a reliable repair, especially on apparel, bags, and branded gear, a correctly matched new slider is the cleaner solution.
Match the replacement slider correctly
Zipper sliders are not universal. A slider made for a molded plastic zipper will not usually work well on a nylon coil zipper. A #5 slider will not fit a #3 zipper. A locking jacket slider may behave differently from a non-locking bag slider.
Check the back or underside of the old slider first. Many sliders are stamped with a number such as 3, 5, 8, or 10. That number usually refers to the zipper size. Also look at the shape of the teeth and the way the pull is positioned.
| What to check | What to look for | Why it matters |
|---|---|---|
| Zipper type | Metal teeth, molded plastic teeth, nylon coil, or invisible coil | Each type needs a compatible slider shape. |
| Slider size | Common markings include 3, 5, 8, or 10 | The slider must match the zipper chain width. |
| Locking style | Auto-lock, semi-lock, or non-locking | Locking sliders help prevent jackets and bags from opening unintentionally. |
| Pull orientation | Single pull, double pull, inside pull, or outside pull | The pull needs to face the usable side of the garment, bag, or cover. |
| Stop style | Metal top stop, molded stop, sewn bar tack, or hidden stop | This determines how you remove and secure the slider. |
If the old slider has no visible marking, take it and the item to a sewing supply store, tailor, or repair shop for comparison. For brands or makers handling multiple repairs, it is worth keeping a small reference kit of your most common zipper sizes and slider types.
How to replace a zipper slider in 6 simple steps
The exact access point may vary depending on whether you are repairing a jacket, backpack, handbag, cushion cover, or sample garment. The overall process is the same: open an end, remove the failed slider, install the new one, and secure the zipper so the slider cannot come off again.
Step 1: Inspect, photograph, and position the zipper
Start by laying the item flat. Take a quick photo of the original slider before removing it, including which side the pull faces and where the stop sits. This is especially helpful on bags, lined garments, cushions, and accessories where the slider orientation is easy to reverse by accident.
Move the slider close to the end where it will be removed. If the zipper is stuck, do not yank it. Check for caught fabric, thread, lining, or debris. Gently free anything trapped in the slider path before continuing.
If the zipper still moves, unzip it enough to release tension from the teeth. On a jacket, keep the bottom box and pin intact. On a bag or cushion cover, identify the end that gives you the easiest access with the least visible stitching.
Step 2: Remove the zipper stop
Most zipper sliders are held on by a top stop. This may be a small metal clamp, a molded plastic block, a sewn thread stop, or a hidden stop inside a seam.
Use needle-nose pliers to gently pry off a metal top stop. Work slowly so you do not tear the zipper tape. If the stop is molded plastic and cannot be reused, you may need to cut it carefully with end nippers. If the stop is sewn, use a seam ripper to remove only the stitches that block the slider, not the zipper tape itself.
For cushion covers and outdoor furniture covers, the zipper end is often tucked into a seam. If the repair is part of a larger upholstery refresh, this guide to build your own custom cushions is a useful companion for thinking through measurements, filling, fabric, and durable cover details.
Step 3: Slide the old slider off
Once the stop is removed, pull the old slider off the zipper tape in the same direction it would naturally exit. Do not twist the slider sideways, since that can bend teeth or distort a nylon coil.
After removing it, compare the old and new sliders side by side. Check that the mouth shape, size, and pull position are similar. If the new slider looks much wider, narrower, shorter, or shaped for a different zipper type, stop before installing it. Forcing a mismatched slider can turn a simple repair into a full zipper replacement.
This is also a good time to clean the zipper chain. Use a soft brush, lint-free cloth, or tweezers to remove dirt, threads, pet hair, or fabric fibers from the teeth.
Step 4: Align the zipper teeth
Before installing the new slider, align both sides of the zipper tape so the teeth are even and not twisted. Uneven tape is one of the most common reasons a new slider goes on crooked.
On a closed-end zipper, such as many bags and cushion covers, bring the two sides together at the open end and make sure the first teeth line up. On an open-end jacket zipper, keep the slider side flat and make sure the tape is not folded or stretched.
If the zipper has been separating for a while, the teeth may have been pulled out of alignment. Gently straighten the tape with your fingers. Avoid ironing directly over plastic teeth or coated zippers unless the item care instructions allow it.
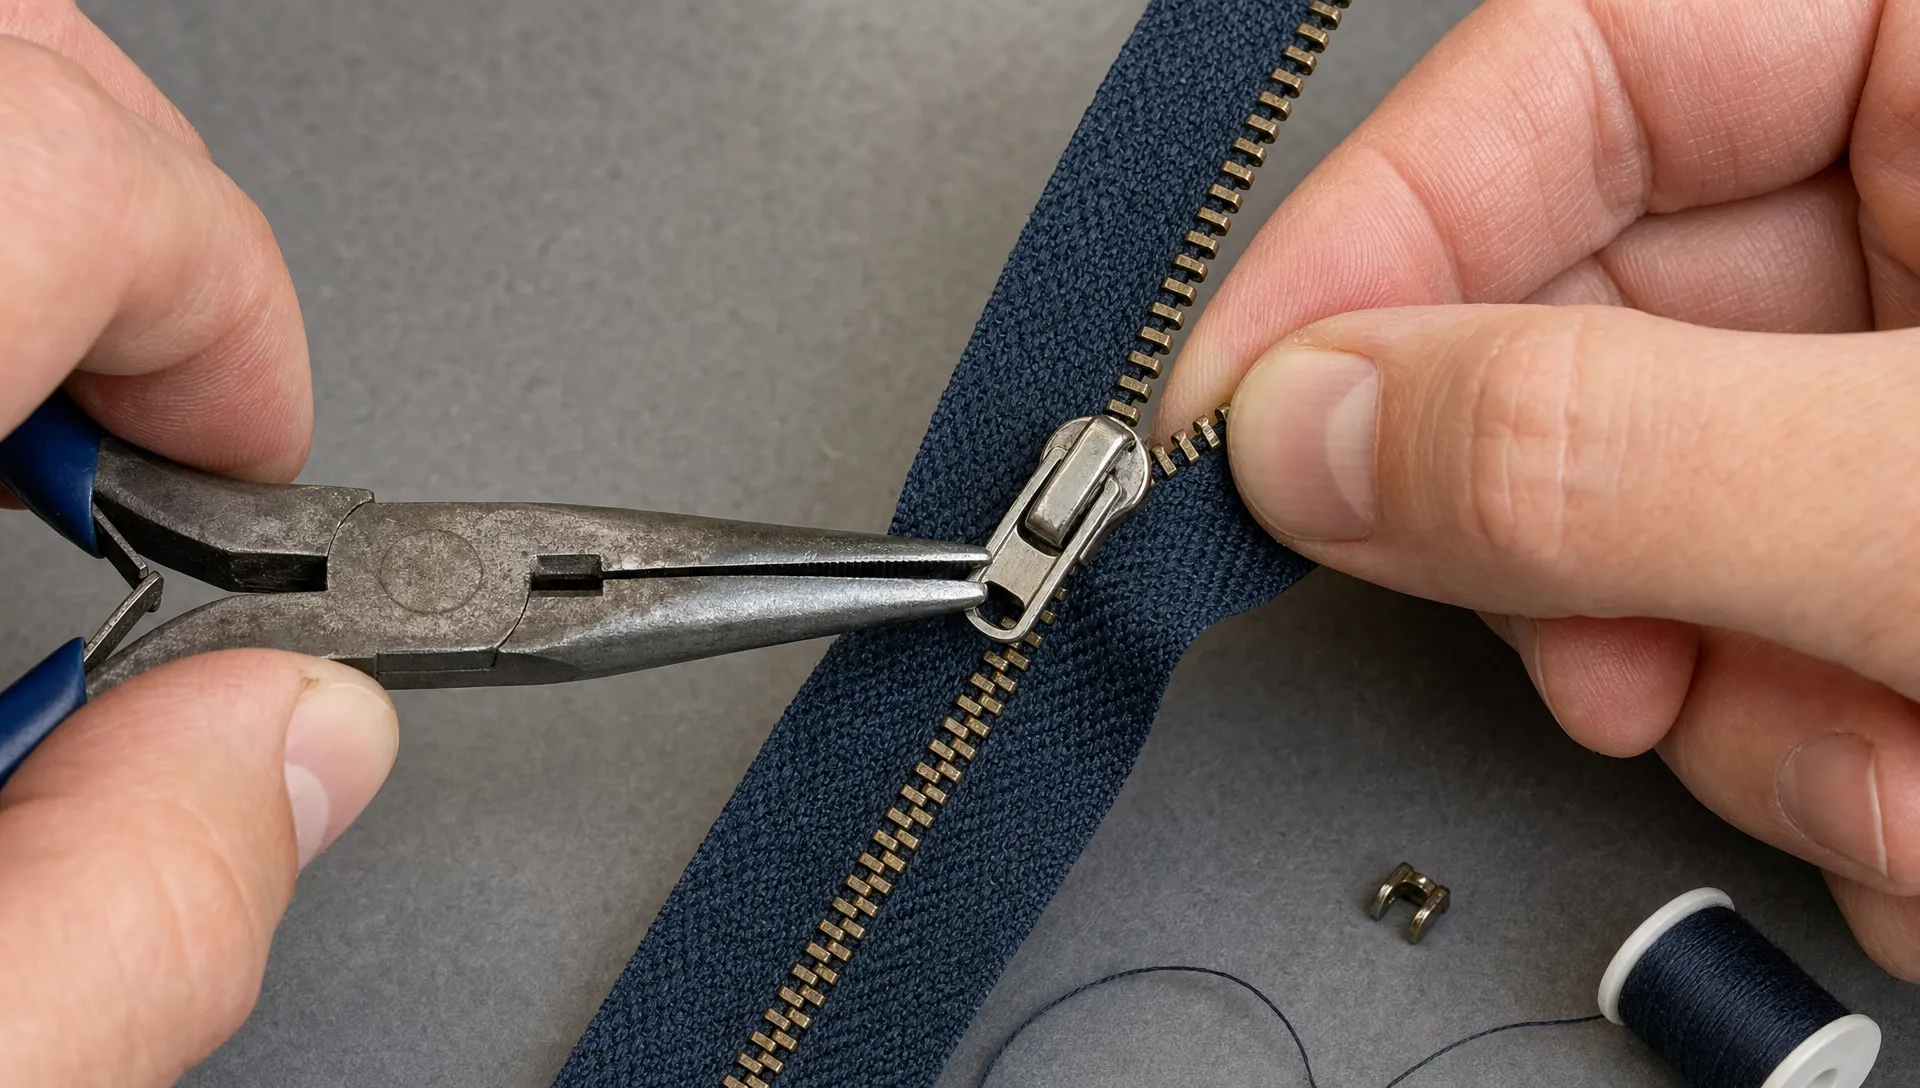
Step 5: Feed the new slider onto the zipper
Hold the new slider in the same orientation as the old one. The pull should face the usable side of the item. For a jacket, that usually means the outside of the garment. For a reversible item, double-sided bag, or cushion cover, confirm which side needs the easiest access.
Feed the zipper tape into the slider channels slowly and evenly. If you are working with two zipper sides, keep the tape ends level as they enter the slider. Pull the slider a short distance, then stop and check the teeth. They should mesh cleanly behind the slider.
If one side is ahead of the other by even a few teeth, remove the slider and try again. Do not keep pulling and hope it corrects itself. A crooked start usually creates a zipper that ripples, jams, or separates later.
For very small zippers, tweezers can help guide the tape into the slider. For large gear zippers, hold the fabric firmly near the base of the slider so you are pulling the slider, not stretching the zipper tape.
Step 6: Replace the stop and test the repair
Once the slider is installed and moving properly, replace the stop before using the zipper normally. A slider without a stop can run off the end and force you to repeat the repair.
If you have a replacement metal top stop, position it where the old one sat and crimp it gently with needle-nose pliers. It should hold firmly without crushing the zipper tape. If you do not have a metal stop, sew a strong thread bar tack across the zipper teeth at the end. Use several tight stitches so the slider cannot pass beyond that point.
Test the zipper at least 10 times. Move slowly at first, then with normal pressure. Check that the teeth mesh evenly, the slider does not wobble, and the stop stays secure. If the zipper is slightly stiff, use a small amount of zipper lubricant, beeswax, or graphite on the teeth, then wipe away any residue that could stain fabric.
Troubleshooting after replacing the slider
If the new slider does not work perfectly on the first try, the issue is usually fit, alignment, or zipper damage rather than the basic repair method.
| Problem | Likely cause | What to do |
|---|---|---|
| Slider will not go onto the teeth | Wrong size, wrong zipper type, or frayed tape end | Recheck the slider marking and trim loose threads carefully. |
| Zipper still separates behind the slider | Slider is too large, teeth are worn, or coil is damaged | Try the correct slider size or replace the zipper if teeth are compromised. |
| Slider moves but feels rough | Dirt, residue, bent teeth, or slight mismatch | Clean the zipper and check for bent or missing teeth before lubricating. |
| Slider comes off the end | Stop was not replaced securely | Install a new metal stop or sew a stronger bar tack. |
| Zipper looks uneven after closing | Slider was started crooked | Remove the slider and feed both sides again from an even starting point. |
A new slider should feel snug but not forced. If you need excessive pressure to move it, something is wrong. Stop and reassess before damaging the tape.
When replacing a zipper slider is not enough
A slider replacement is a smart fix when the moving part has failed, but it cannot repair every zipper problem. If the zipper chain itself is damaged, the slider has nothing reliable to grip.
You may need a full zipper replacement if the zipper has missing metal teeth, cracked molded teeth, a nylon coil pulling away from the tape, torn fabric tape, broken stitching along the seam, or a damaged insertion box on an open-end jacket zipper. Waterproof and water-resistant zippers can also be more specialized, so replacing the slider may affect performance if the component is not matched correctly.
For higher-value garments, technical outerwear, branded bags, uniforms, and production samples, a tailor or repair shop can often save time and prevent visible damage. This is especially true when the zipper end is hidden inside lining or binding.
Small upgrade: add a better pull after the slider repair
Once the slider works again, consider whether the pull itself is doing enough. A tiny metal tab may be fine on a dress or small pouch, but jackets, backpacks, travel bags, workwear, and outdoor gear often benefit from a larger or more tactile pull.
A better pull can improve grip, make compartments easier to identify, and reinforce the product's visual identity. That matters for both individual repairs and brand production runs. HiLabels covers this in more detail in its guide to how zipper pulls boost function and branding.
If you are repairing or developing branded apparel and accessories, you can also finish the zipper with a custom zipper pull that matches your labels, patches, and overall product design. The slider handles the mechanics, but the pull is what customers touch every time they use the product.
Frequently Asked Questions
Can I replace a zipper slider without replacing the whole zipper? Yes, if the zipper teeth, tape, stitching, and end hardware are still in good condition. If the zipper separates only because the slider is worn or loose, replacing the slider is often enough.
How do I know what size zipper slider I need? Look for a number stamped on the old slider, such as 3, 5, 8, or 10. Also match the zipper type, such as metal, molded plastic, nylon coil, or invisible coil. Size alone is not enough if the slider shape is wrong.
Can I fix a separating zipper by squeezing the slider with pliers? Sometimes, but it is usually a temporary fix. Lightly tightening a loose slider can help in a pinch, but overcrimping can make the zipper jam or damage the teeth. A matching replacement slider is more reliable.
Do I need to sew after replacing a zipper slider? Not always. If the zipper uses metal top stops, you can often crimp on a replacement stop. If you do not have a stop or the original end was sewn, a strong thread bar tack can keep the slider from coming off.
Why does my new slider keep jamming? The most common reasons are a mismatched slider, crooked installation, dirty teeth, bent teeth, or frayed zipper tape. Remove the slider, check the fit, clean the chain, and reinstall it evenly.
Should the zipper pull face inside or outside? It should face the side from which the zipper will be used most often. For jackets and bags, that is usually the outside. For cushions, covers, or reversible products, check the original orientation before removing the old slider.
Repair the function, then refine the details
Replacing a zipper slider is a practical repair, but it is also a reminder that small hardware details shape how a product feels in daily use. A smooth slider, secure stop, and comfortable pull can extend the life of a garment, bag, cushion cover, or accessory.
For brands and makers, those details also support a more polished customer experience. HiLabels helps apparel and accessory businesses create custom woven labels, care labels, patches, ribbons, and zipper pulls with durable, professional finishing in mind. If you are upgrading your product details after a repair or preparing a new run, choose components that look good, feel good, and stand up to repeated use.


