How to Install a Zipper Pull That Stays Secure
A zipper pull seems like a small detail until it slips off in your hand, jams halfway through a commute, or makes a bag harder to use. The good news is that installing a zipper pull securely is usually a simple repair. The key is matching the pull, attachment method, and zipper slider so the connection can handle real movement, not just look good for a quick photo.
Whether you are replacing a broken tab on a jacket, adding grip to a backpack, or attaching branded pulls to a product line, the same principles apply: inspect the slider, choose a strong connection point, close or tie the attachment correctly, then test it before the item goes back into use.
Before You Start, Check the Slider
Before installing a zipper pull, look closely at the slider itself. The slider is the moving metal or plastic piece that opens and closes the zipper. Most pulls attach to a small bridge, hole, or bail on the top of that slider.
If that bridge is intact, you can usually add a new pull without replacing the entire zipper. If the bridge is cracked, bent open, or missing, a new pull may not stay secure no matter how carefully you install it. In that case, the better fix is often a new slider. HiLabels has a separate guide on how to replace a zipper slider if the slider itself is the weak point.
You should also check whether the zipper still opens and closes smoothly. If the slider is loose, misaligned, or separating the teeth behind it, the pull is not the main problem. Fix the function first, then add the pull.
Tools and Parts You May Need
For most zipper pull installations, you do not need a sewing machine or specialty repair bench. A few small tools are enough.
- Replacement zipper pull, cord pull, tab, or branded pull
- Needle-nose pliers for closing rings or adjusting small parts
- Split-ring pliers, helpful for small split rings
- Small flat screwdriver for gently removing damaged remnants
- Scissors if trimming cord
- Lighter for sealing synthetic cord ends, used carefully and only when appropriate
Choose tools that fit the scale of the zipper. A heavy pair of pliers can crush a small garment slider, while tiny jewelry pliers may not close a thick metal ring tightly enough for outdoor gear.
Choose the Right Attachment Style
The most secure zipper pull is not always the heaviest or most decorative one. It is the one that suits the item, the slider, and the amount of force the user will apply.
| Attachment style | Best for | Security tip |
|---|---|---|
| Split ring | Jackets, backpacks, gear bags | Use a ring that fully rotates through the slider hole without prying it open too far. |
| Cord loop | Outdoor gear, kidswear, gloves, small pouches | Tie a compact stopper knot and seal synthetic ends to prevent fraying. |
| Metal jump ring | Decorative pulls, custom tags, handbags | Close the ring side-to-side with pliers so the ends meet cleanly. |
| Swivel clasp or hook | Removable pulls, luggage, accessories | Confirm the clasp gate fully closes after installation. |
| Molded, woven, or rubber pull with loop | Branded apparel and bags | Match the loop thickness to the slider opening before production or bulk use. |
For high-use products, a split ring or closed loop is usually more secure than a simple open hook. For children’s items, soft cord or flexible pulls can be more comfortable and less likely to snag.
Step 1: Remove the Old Pull or Broken Pieces
If a broken pull tab is still attached, remove it carefully. Do not twist the slider bridge aggressively, because that small bridge is what your new pull needs to hold onto.
For a split ring or cord remnant, work it out slowly through the slider opening. For a broken metal tab, use needle-nose pliers to bend only the damaged pull component, not the slider. If the original tab has snapped but the slider is still usable, you may also want to review this guide on fixing a broken zipper pull without replacing the zipper for repair options before choosing a replacement style.
Once the old parts are removed, wipe away lint, dirt, or corrosion around the slider. A clean attachment point helps you see whether the bridge is cracked or bent.
Step 2: Install a Split Ring Pull
A split ring is one of the simplest and most secure ways to install a zipper pull. It works like a miniature key ring and is especially useful for backpacks, jackets, duffel bags, and utility pouches.
Start by opening the split ring just enough to catch the slider bridge. A split-ring tool makes this easier, but a thin flat screwdriver can work if you are careful. Slide the ring around until the slider bridge sits fully inside the ring, not between the ring layers.
Then attach your pull tab, cord, or charm to the same ring. Once everything is on, rotate the ring so the split opening is not sitting directly at the point that receives the most pulling force. This reduces the chance of the ring working itself loose over time.
Avoid over-opening the ring. If the ring becomes distorted and does not spring back into a tight circle, replace it. A stretched split ring is one of the most common reasons a pull falls off later.
Step 3: Install a Cord Zipper Pull
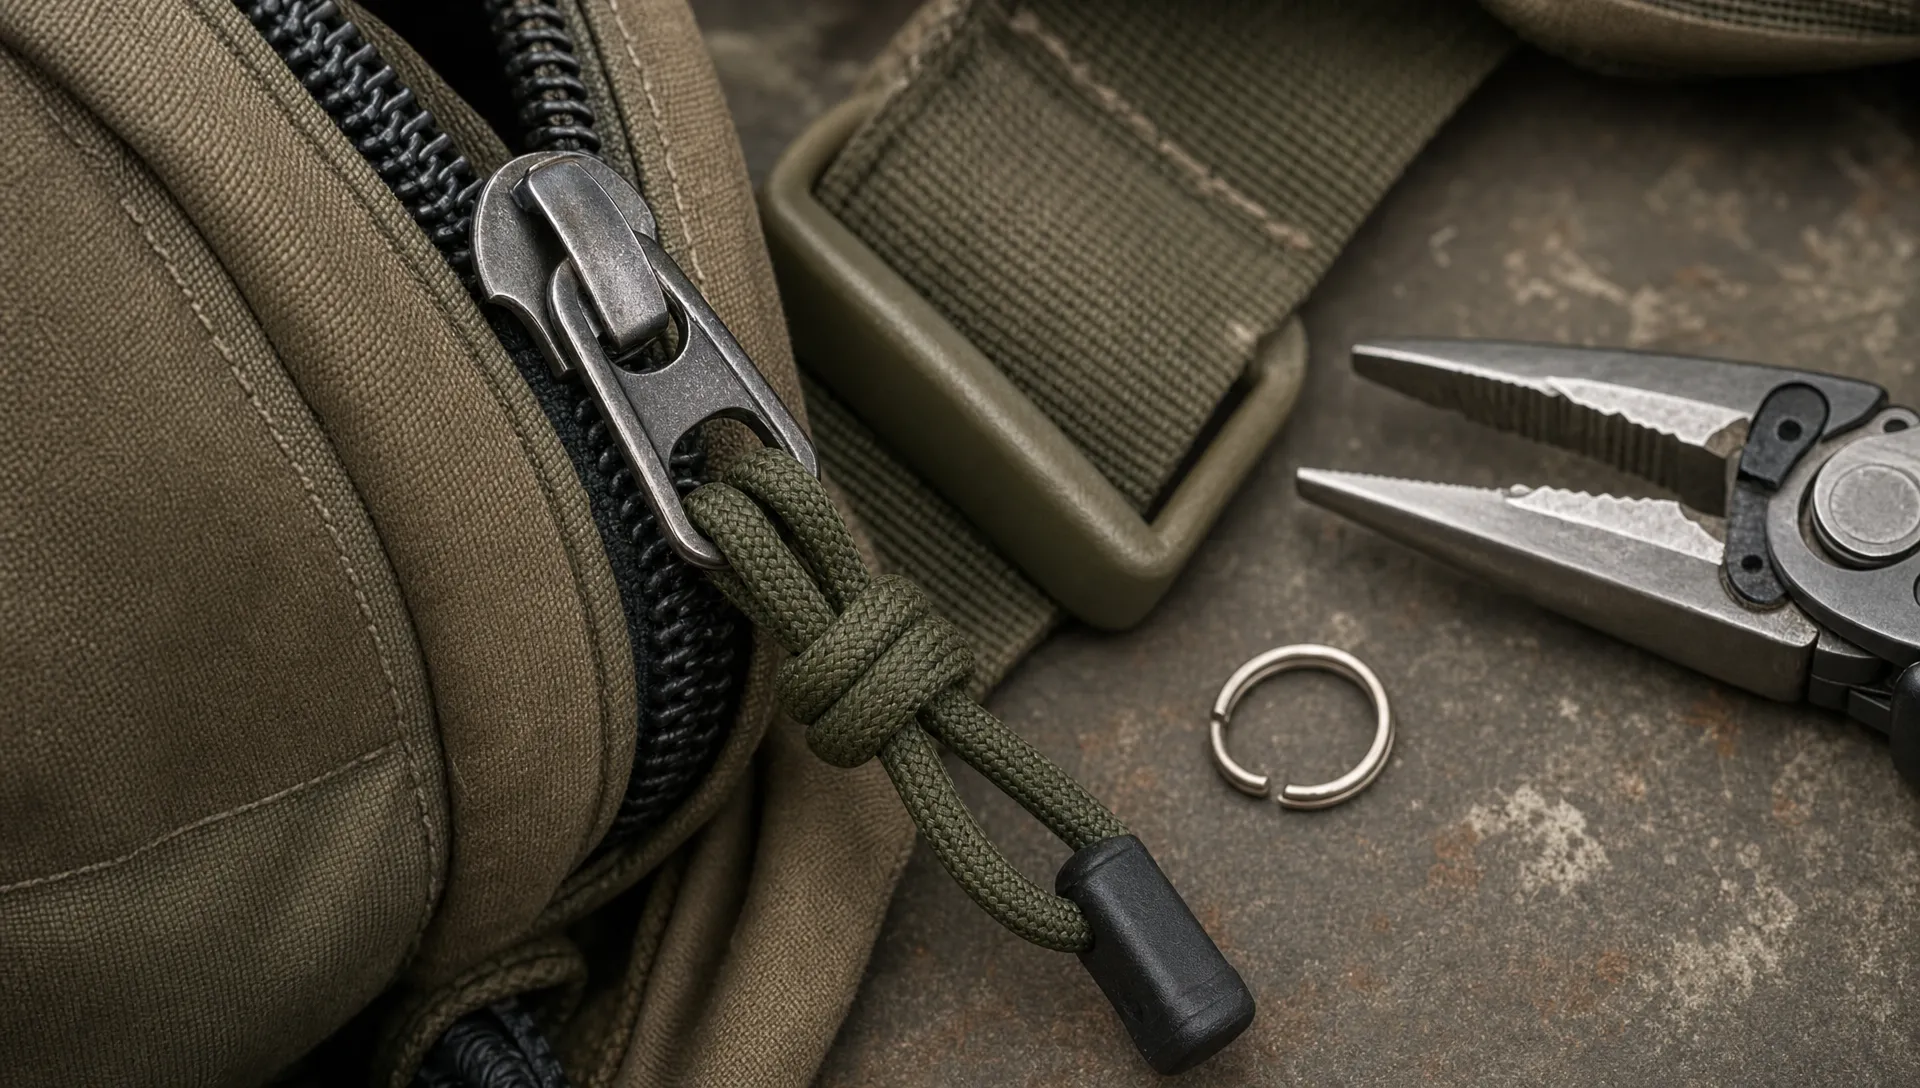
Cord zipper pulls are excellent when you need grip, flexibility, or quiet movement. They are common on outdoor jackets, backpacks, sportswear, travel bags, and small zip pouches.
Thread the cord through the slider bridge so both ends are even. Bring the ends through the loop to create a lark’s head knot, then pull it snug against the slider. This knot tightens under tension and stays compact, which is why it works well for zipper pulls.
Next, tie the loose ends together using a tight overhand knot or stopper knot. Trim excess cord, leaving a small tail so the knot does not slip. If the cord is synthetic, you can carefully melt the ends with a lighter to reduce fraying. Do this away from the garment or bag material, and never use flame near delicate fabrics, coatings, or flammable finishes.
For a more finished look, you can add a small molded grip, shrink tube, or branded tab to the cord ends. Just make sure the final pull is not so bulky that it catches on fabric, straps, or neighboring zippers.
Step 4: Install a Metal, Rubber, or Branded Pull
Metal, rubber, leather-style, and woven zipper pulls often use a small ring, loop, or connector. These pulls can make a product feel more finished, especially on bags, outerwear, uniforms, and branded accessories.
If the pull uses a jump ring, open the ring by twisting one end forward and the other backward. Do not pull the ring apart like a C shape, because that weakens it and makes it harder to close tightly. Slide the ring through the zipper slider and the pull, then twist the ends back together until they meet flush.
If the pull uses a clasp, check the clasp gate after installation. It should spring closed without a gap. If it catches, sticks, or leaves an opening, it may release under stress.
If you are installing pulls across a product run, consistency matters. Check that every pull hangs in the same direction, clears nearby seams, and does not interfere with zipper movement. For branded products, you can explore custom zipper pulls from HiLabels when you want the pull to match your labels, patches, or other trim details.
Step 5: Test the Pull Before Use
Once the pull is installed, test it before you consider the repair finished. Close and open the zipper several times using normal hand force. Then give the pull a few firmer tugs in the direction it will be used.
Watch for three things: the attachment should not spread open, the knot should not loosen, and the slider bridge should not bend. If anything shifts during testing, fix it immediately rather than waiting for it to fail in daily use.
Also test the pull at different angles. A jacket zipper is often pulled upward and slightly outward. A backpack zipper may be pulled around a curve. A luggage zipper may experience sideways force when the bag is packed full. The installation needs to survive the way the item is actually handled.
Why Zipper Pulls Come Loose
A zipper pull usually fails because the attachment method was not suited to the stress point. Sometimes the replacement pull is fine, but the connector is too weak. Other times, the pull is attractive but too heavy for a small slider.
Common causes include open jump rings that were not fully closed, split rings that were stretched during installation, cord knots that were not tightened properly, and slider bridges that were already cracked. Size mismatches are another issue. A ring that is too thick can strain the slider opening, while a ring that is too small can bind and twist during use.
Weight also matters. A large metal pull may look premium, but if it is attached to a lightweight dress zipper, it can create unnecessary stress. On heavy bags or outerwear, the opposite problem can occur: a thin decorative connector may not be strong enough for repeated pulling.
Best Installation Method by Product Type
Different products place different demands on zipper pulls. Matching the installation method to the item helps the pull stay secure longer.
| Product type | Recommended pull style | Installation note |
|---|---|---|
| Jackets | Cord, rubber, metal, or woven pull | Make sure the pull is easy to grip with cold hands or gloves. |
| Backpacks | Split ring with cord, rubber, or metal pull | Test around zipper curves and under packed-bag tension. |
| Handbags | Metal or decorative pull | Use a tightly closed ring that aligns with the bag hardware finish. |
| Kidswear | Soft cord or flexible rubber pull | Avoid sharp edges and oversized parts that can snag. |
| Outdoor gear | Cord pull or rugged molded pull | Choose materials that tolerate moisture, cold, and repeated force. |
| Product samples | Branded pull with consistent connector | Check orientation and finish before scaling to larger orders. |
For branded apparel or accessories, zipper pulls are both functional and visual. They can make a zipper easier to use while reinforcing brand recognition each time someone opens a pocket or bag. If you are considering pulls as part of a broader trim strategy, HiLabels also explains how zipper pulls boost function and branding across apparel and accessories.
Tips for a More Secure, Professional Finish
Small installation choices can make a zipper pull look and feel more durable. Use connectors made for movement, not fragile craft rings that deform easily. Align the pull so the logo or grip surface faces outward when the zipper is at rest. Keep the pull length proportional to the item, since an overly long pull can catch on handles, straps, and neighboring compartments.
For cord pulls, keep knots compact and consistent. For metal pulls, check that ring seams are closed and smooth. For rubber or woven pulls, confirm the attachment loop is not being pinched sharply by the slider opening.
If you are installing many pulls for a brand, create a quick quality check. Pull each zipper several times, check orientation, and inspect the connector. This takes only a moment per item, but it prevents returns, complaints, and inconsistent presentation.
Installing Zipper Pulls for Branded Products
For apparel brands, bag makers, merch teams, and private-label products, zipper pulls should be planned before the final production stage. The pull material, attachment style, logo placement, color, and size all affect the finished product.
A secure installation starts with the design spec. Confirm the slider opening dimensions, connector type, pull weight, and intended use. A fashion pouch, rain jacket, and work backpack may all use custom pulls, but they should not necessarily use the same connector.
Zipper pulls can also support a broader physical brand experience. For example, a launch might include custom pulls on the product, matching woven labels, packaging inserts, catalogs, or mailed promotions. If your team coordinates product branding with physical outreach, an all-in-one direct mail platform for brands and agencies can help manage campaigns alongside other tactile brand touchpoints.
The more consistent your physical details are, the more professional the product feels. A secure zipper pull is not just a repair detail. It is part of how customers experience quality.
Maintenance After Installation
After a new pull is installed, occasional maintenance keeps it secure. Check rings and knots after the first few uses, especially on high-stress items like backpacks, luggage, and workwear. If the ring has shifted or the knot has loosened, correct it early.
Keep the zipper clean and moving smoothly. When a zipper sticks, people naturally pull harder, which increases stress on the pull and connector. Removing dirt from the teeth and avoiding forced pulls can extend the life of both the zipper and the pull.
If a pull repeatedly comes loose, do not keep reinstalling it the same way. That usually means the connector, slider, or pull weight is wrong for the application. Switching to a split ring, stronger cord, or better-matched custom pull is often the lasting solution.
Frequently Asked Questions
Can I install a zipper pull without sewing? Yes. Most zipper pulls attach to the slider with a split ring, cord loop, jump ring, or clasp, so sewing is usually not required.
What is the most secure way to attach a zipper pull? For many everyday items, a properly sized split ring is one of the most secure options. For outdoor gear and jackets, a cord loop with a tight lark’s head knot and stopper knot can also be very reliable.
Why does my zipper pull keep falling off? The most likely causes are a stretched ring, an open connector, a loose knot, or a damaged slider bridge. Inspect the slider first, then replace weak connectors with a sturdier attachment style.
Can I add a custom zipper pull to an existing jacket or bag? Yes, as long as the slider bridge is intact and the pull uses a compatible connector. Make sure the pull is not too heavy for the zipper and test it from the angles used in daily wear.
Should I replace the whole zipper if the pull breaks? Not usually. If the zipper teeth and slider work properly, you can often replace only the pull. If the slider bridge is broken or the zipper separates, a slider replacement or zipper repair may be needed.
Create Zipper Pulls That Look Good and Stay Put
Installing a zipper pull that stays secure comes down to a few practical decisions: start with a sound slider, choose the right attachment, close or tie it correctly, and test it under real use conditions. For a single repair, that may mean a split ring or cord pull. For a brand, it means designing a pull that supports both function and identity.
HiLabels helps brands create custom woven labels, patches, ribbons, care labels, and zipper pulls with professional craftsmanship and an easy online ordering process. If you are planning branded apparel, bags, accessories, or merch, start with a zipper pull that feels as reliable as it looks.


