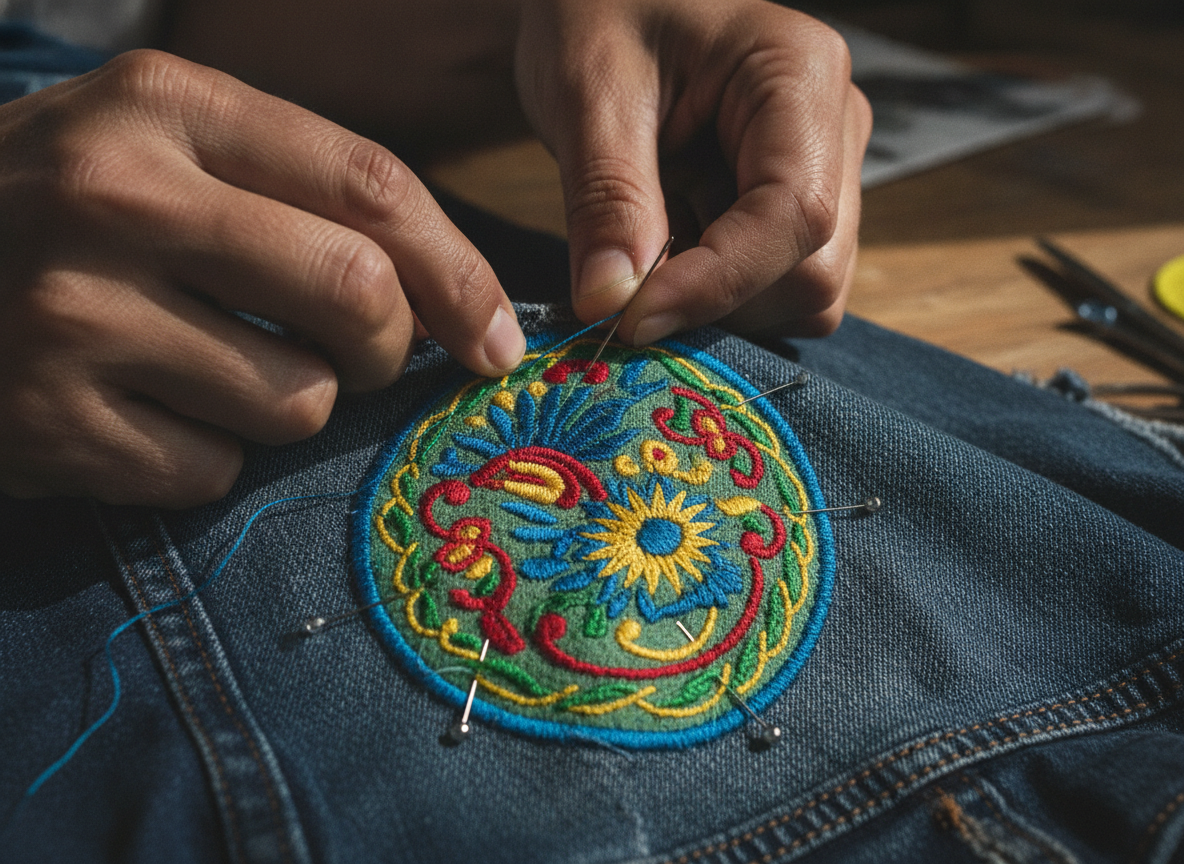
Patches offer a fantastic way to personalize garments, cover minor imperfections, or showcase your affiliations and interests. They transform ordinary clothing into unique statements, adding character and flair. However, mastering how to sew a patch effectively requires precision and the right technique to ensure durability and a polished appearance. A well-sewn patch looks intentional and lasts through countless wears and washes, truly becoming a part of the garment.
Whether you are revamping an old denim jacket, adding a badge to a backpack, or repairing a tear with style, understanding the proper sewing method is crucial. This comprehensive guide equips you with the knowledge and steps to confidently attach any patch, achieving a result that looks professional and stands the test of time.
Gathering Your Essential Tools and Materials
Before you begin the stitching process, assemble all necessary items. Having your tools organized and readily accessible makes the task significantly smoother and more enjoyable. Therefore, take a moment to collect everything you need.
First, you need a high-quality patch. At HiLabels, we specialize in producing custom woven and embroidered patches with European loom quality, designed to withstand frequent use and washing. Selecting a patch that complements your garment's fabric and style is important. You will also need a strong, sharp needle; an embroidery needle or a denim needle works well for thicker fabrics. Furthermore, choose a thread color that either matches the patch's border exactly or blends seamlessly with the garment for a discreet look. For added strength, consider using heavy-duty polyester or nylon thread.
Additionally, gather a pair of small, sharp scissors for trimming thread, a thimble to protect your finger as you push the needle through tough fabrics, and plenty of straight pins or fabric clips to hold the patch in place. Some people also find temporary fabric adhesive or fusible webbing helpful for initial placement. These tools collectively prepare you for a successful sewing experience, ensuring a secure attachment every time.
Preparing Your Garment and Patch for Stitching

Proper preparation lays the groundwork for a flawless finish. This critical stage involves deciding on the patch's placement and securing it firmly before any needlework begins. Consequently, take your time with these initial steps to avoid redoing work later.
First, decide on the exact placement of your patch. Consider the overall design of the garment and how the patch will contribute to its aesthetic. For instance, on a sleeve, measure from the shoulder seam to ensure consistent positioning. On a pocket, center it carefully. Use a ruler or measuring tape to achieve precise alignment. After settling on the spot, clean and press the area of the garment where the patch will go. A smooth, wrinkle-free surface helps the patch lie flat and prevents puckering.
Next, carefully position the patch on the garment. Once you are satisfied with its placement, secure it using several straight pins. Push the pins through the patch and into the garment, making sure they do not distort the fabric. For extra stability, especially with larger or oddly shaped patches, consider using a temporary fabric adhesive or basting stitches around the edge. This extra step prevents shifting while you sew, which is crucial for maintaining an even border. Always test any adhesive on an inconspicuous area first to ensure it will not damage the fabric. Proper preparation significantly simplifies the actual sewing process, ensuring a crisp, clean application.
Step-by-Step Guide: How to Sew a Patch Securely
Successfully sewing a patch involves careful stitching that holds it firmly in place without compromising the garment's integrity. Follow these steps closely to ensure a professional and lasting attachment. This section focuses specifically on how to sew a patch by hand, offering maximum control and precision.
Begin by threading your needle with about 18-24 inches of thread. Double the thread for extra strength, then tie a secure knot at the end. You want enough thread to work with comfortably, but not so much that it tangles easily. Push your needle from the inside of the garment, coming up just along the very edge of the patch. Pull the thread through until the knot is snug against the fabric on the inside. This hides your starting knot and provides a clean beginning.
There are several effective stitches you can use:
- Running Stitch: This simple stitch creates a series of small, even stitches. Push the needle down through the patch and garment a short distance from where you emerged, then bring it back up a similar distance away. Repeat this motion, creating a dashed line around the patch's border. Keep your stitches small and uniform for the best appearance.
- Whipstitch: For a more secure and discreet edge, use a whipstitch. After bringing your needle up through the garment and patch edge, loop the thread over the edge of the patch. Then, push the needle down through the garment very close to where you just came up, catching a small amount of the patch's edge. Pull tightly, creating a tight loop. Repeat, wrapping the thread around the edge of the patch with each stitch.
- Blanket Stitch: This decorative and very sturdy stitch is excellent for patches with a finished edge. Bring the needle up through the garment just inside the patch's edge. Then, insert the needle a short distance away, wrapping the thread under the needle before pulling it through. This creates a small "L" shape on the edge.
As you sew, keep your stitches tight and even. Continuously check the back of the garment to ensure your stitches are neat and do not show through excessively. When you approach the end of your thread or finish stitching around the entire patch, secure your work. To do this, make a small stitch on the back of the garment, creating a loop. Pass your needle through the loop two or three times to form a sturdy knot. Trim any excess thread close to the knot. This process ensures the patch remains firmly attached, even with regular wear.
Tips for a Professional Finish and Durability

Achieving a professional-looking patch attachment involves more than just basic stitching; it requires attention to detail and ongoing care. These tips help ensure your hard work results in a durable and aesthetically pleasing addition to your garment.
Firstly, consider reinforcing your stitches, especially around corners or areas that might experience more stress. You can do this by making a few extra stitches in those critical spots. For patches with a thicker border, like many HiLabels patches, ensure your needle goes through the entire thickness of the border to anchor it properly. Furthermore, always hide your knots on the inside of the garment. This simple step prevents unsightly bumps or loose ends from appearing on the exterior.
Secondly, after sewing, gently press the patch with an iron on a low to medium setting (check the garment's fabric care instructions first). Place a thin pressing cloth over the patch to protect it. Pressing helps flatten the patch, remove any slight puckering from sewing, and encourages it to meld seamlessly with the garment's fabric. This simple step significantly enhances the finished look. However, be mindful of any heat-sensitive patch materials, like certain plastics or embellishments, which may melt or warp.
Finally, proper care extends the life of your patched item. Whenever possible, hand wash the garment or use a gentle cycle with cold water. Avoid harsh detergents and direct heat from dryers. Instead, air dry the item to prevent shrinkage or damage to the patch. Turning the garment inside out before washing can also protect the patch from abrasion. By following these guidelines, you ensure your patch remains a vibrant and secure part of your clothing for years to come.
Common Mistakes to Avoid When Sewing Patches
Even experienced sewers can make errors, and avoiding common pitfalls ensures a smoother process and better results when you sew a patch. Being aware of these mistakes helps you sidestep potential frustrations and achieve a polished outcome.
One frequent mistake is neglecting proper placement and securing. Many people rush this step, leading to crooked patches or uneven edges. Always take the time to measure, pin thoroughly, or use temporary adhesive to ensure the patch remains exactly where you want it during stitching. A patch that shifts mid-sew often requires tedious unpicking and re-stitching, which can damage both the patch and the garment.
Another common error involves using the wrong type of thread or needle. Using standard sewing thread on heavy denim or a thick patch can result in easily broken stitches, compromising the patch's longevity. Similarly, a flimsy needle might bend or break, making the sewing process frustrating and potentially injuring your finger. Always match your needle and thread to the thickness and material of both the patch and the garment. For example, a heavy-duty polyester thread offers superior strength and abrasion resistance compared to delicate cotton thread.
Furthermore, avoid making stitches too large or too far apart. Large stitches are not only visible but also provide less security, making the patch vulnerable to snagging and detachment. Aim for small, consistent stitches that are close enough to securely hold the patch's edge without being overly crowded. Finally, do not forget to properly knot your thread at the beginning and end of your sewing. A weak knot unravels easily, causing the entire patch to come loose. Strong, hidden knots are essential for ensuring the patch's long-term adhesion and preventing premature wear.
FAQ: Sewing Patches
Q1: Can I machine sew a patch instead of hand sewing?
A1: Yes, you can machine sew a patch. A zigzag stitch or a straight stitch around the patch's border works well. However, hand sewing offers more control, especially for smaller or intricately shaped patches, and is often preferred for a neater finish on thick fabrics.
Q2: What is the best thread for sewing patches?
A2: Heavy-duty polyester or nylon thread is generally best. It is strong, durable, and resistant to wear and tear, ensuring your patch stays securely attached. Match the thread color to your patch's border or the garment for a seamless look.
Q3: How do I prevent the patch from puckering the fabric?
A3: To prevent puckering, ensure your garment fabric is smooth and taut before placing the patch. Pin the patch securely around its entire perimeter. When sewing, use even tension and avoid pulling the thread too tightly. Pressing the area before and after sewing also helps flatten the fabric.
Q4: How long does it take to hand sew a patch?
A4: The time varies depending on the patch's size, shape, and your sewing experience. A small, simple patch might take 15-30 minutes, while a larger, more complex one could take an hour or more. Focus on precision rather than speed for the best result.
Attaching a patch transforms your clothing and accessories, making them truly your own. By understanding how to sew a patch with precision and care, you ensure each creation is a testament to your personal style and attention to detail. Whether you are adding a decorative element or mending a beloved item, these techniques equip you for success. Explore the possibilities of personalizing your wardrobe with high-quality patches that reflect your unique identity. Discover our extensive range of custom patches, designed with exceptional European loom quality, by visiting HiLabels.com today. Create something truly special!


