How to Attach Embroidered Shirt Tags Without Puckering
Attaching embroidered shirt tags without puckering starts with keeping the shirt relaxed, not pulling it flat while you sew. A dense tag and a lightweight shirt behave differently under the presser foot, so even a neat-looking seam can leave ripples once the fabric is released.
The most reliable approach is to baste the tag onto unstretched fabric, test your needle and stitch settings, then sew without pushing or pulling either layer. Stabilizer can help with troublesome knits, but it should not be the first fix for excessive tension or an unsuitable label.
This guide covers attaching finished tags, rather than embroidering a design directly onto a shirt.
Check the label construction before sewing
An embroidered label has decorative stitches worked into a base fabric. A woven label forms its lettering and design from interlaced threads. Printed labels apply information to a fabric surface. These constructions differ in thickness, flexibility and how comfortably they sit against skin.
For a lightweight T-shirt, a small, flexible label is generally easier to attach smoothly than a large, densely embroidered badge. Fine lettering may also suit weaving or printing better than embroidery. Check the artwork at its actual finished size rather than judging an enlarged screen preview.
When choosing embroidered shirt tags, look for a finished edge and a usable sewing margin that will not force the needle through heavy decorative stitching. Confirm whether the backing is intended for sewing, heat application or another attachment method.
If you are still deciding on construction, HiLabels’ guide to choosing custom fabric tags for clothing brands explains the options. Choose the label for the garment, not just for the logo.
Why embroidered shirt tags pucker
Puckering happens when the label, thread and shirt cannot settle into the same relaxed shape. The cause may be mechanical, such as uneven feeding, or material-related, such as different shrinkage after laundering.
Use the timing and appearance of the ripples to narrow down the problem:
| What you notice | Possible cause | First adjustment to test |
|---|---|---|
| Shirt gathers along the stitch line immediately | Excessive thread tension or too many stitches | Check threading, then test a modest tension reduction or longer stitch |
| Ripples appear after removing the shirt from the machine | Fabric stretched during sewing | Baste first and support the garment’s weight |
| Label shifts and the last edge develops a bubble | Layers feed unevenly | Improve basting and test presser-foot pressure |
| Needle holes, skipped stitches or snagging | Unsuitable, damaged or blunt needle | Fit a fresh needle suited to both layers |
| Tag lies flat initially but puckers after washing | Unequal shrinkage or unsuitable care conditions | Compare washed samples before production |
These are starting points, not certain diagnoses. Change one variable at a time so you can tell which adjustment actually helps.
Set up a test seam before touching the finished shirt
Use an offcut of the actual garment fabric and a spare label whenever possible. A test on woven cotton will not tell you how a stretchy jersey shirt will behave.
For embroidered shirt tags, the needle must pass cleanly through the label without damaging the lighter shirt underneath. A jersey or stretch needle is often appropriate for knits, while a sharp or universal needle may suit a woven shirt. Follow your machine’s guidance and test the smallest suitable size that forms reliable stitches through both layers.
Start with a good-quality general-purpose sewing thread compatible with the garment’s care requirements. Heavy decorative thread adds bulk and is usually unnecessary for attachment.
On a stable woven sample, a straight stitch around 2.5 mm long is a reasonable starting point, not a universal setting. Very short stitches can gather fabric and create a stiff, perforated edge. For knits, choose the stitch after considering how much the attachment area needs to stretch.
Rethread the machine with the presser foot raised before chasing tension problems. If stitches still draw up the sample, reduce upper tension gradually and check both sides. Avoid changing bobbin tension unless you understand the machine’s adjustment procedure.
Attach the tag in four controlled stages
Prepare the shirt and support its weight
If the shirt fabric is washable and likely to shrink, prewash and dry it using the intended care method before sewing. Ask the label supplier about shrinkage and care compatibility rather than assuming the tag can tolerate the same treatment.
Press the attachment area only as the garment’s care instructions allow, then let it cool flat. Do not stretch a knit into shape with the iron.
Lay embroidered shirt tags on the relaxed garment to check their position before marking. Keep a neck tag clear of the tightest part of the collar curve and avoid placing a rigid label across an area that must stretch for dressing.
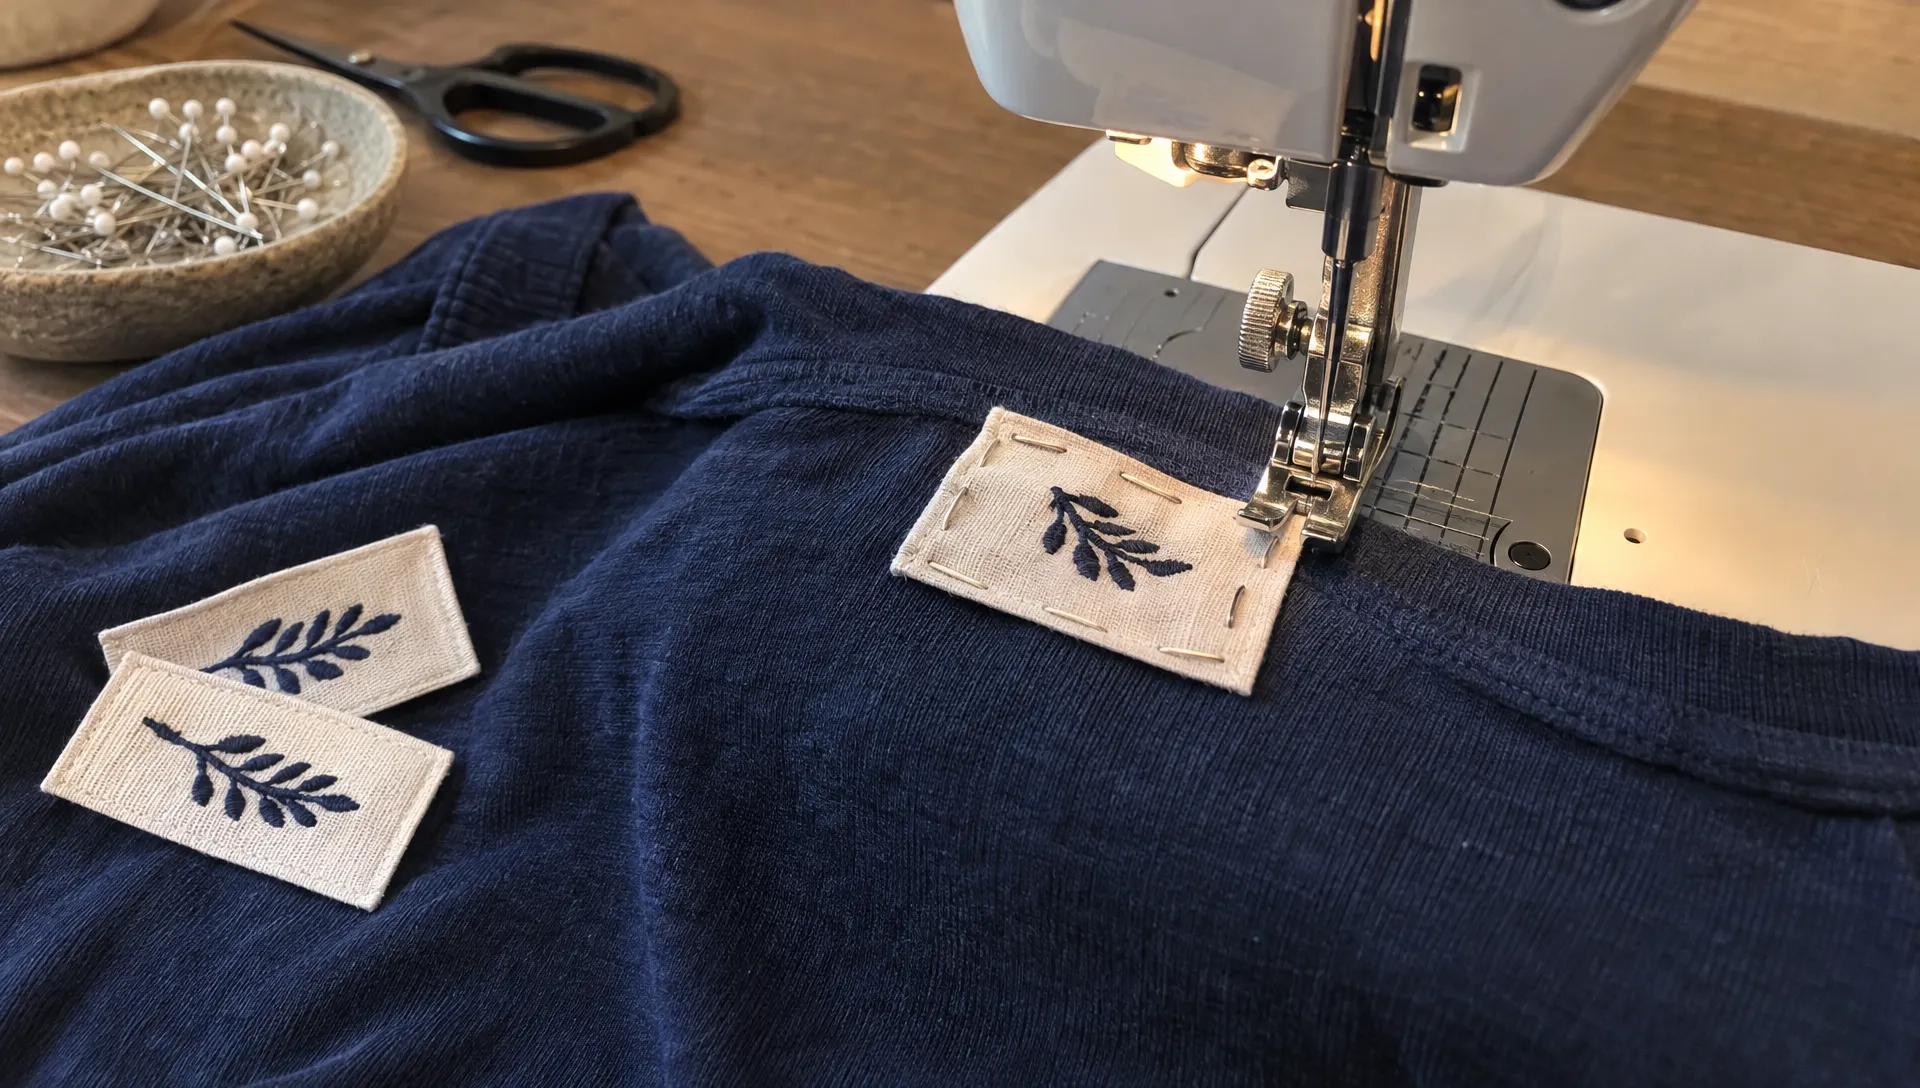
Open the shirt so you can sew through only the intended layer. Support the rest on the table; a hanging sleeve or shirt body can pull a light knit out of shape while the machine feeds it.
Baste instead of relying on pins alone
Pins hold specific points, but a flexible shirt can still shift between them. Hand-basting with long, loose stitches gives you better control over the relationship between the tag and garment.
Baste close enough to the planned attachment line to hold the layers together, while leaving room for the machine needle. Keep the shirt relaxed throughout. A tag that looks flat only when the fabric is stretched underneath it is not ready to sew.
For particularly unstable jersey, test a small piece of lightweight stabilizer behind the attachment area. A soft permanent stabilizer may provide support, but it also changes the feel and stretch of the finished shirt. Wash-away products are an option only when both materials tolerate the required removal process.
Avoid automatically using heavy tear-away backing on delicate knits. Removing it can distort the fabric or stress the new seam. Often, careful basting and lighter handling are enough.
Sew without stretching either layer
Sew slowly along the label’s intended sewing margin. Guide the direction rather than pushing the tag toward the needle or pulling the shirt from behind the foot.
For embroidered shirt tags on stable fabric, a straight stitch can work well when the attachment area does not need to stretch. On knits, a narrow zigzag may give the seam some movement, but it cannot make a rigid label stretch. If the garment needs substantial stretch at that location, change the placement or label construction.
If your machine allows presser-foot pressure adjustment, test a lighter setting when the foot appears to stretch or push the upper layer. Too little pressure can also cause poor feeding, so compare samples rather than simply choosing the lowest setting.
An even-feed or walking foot can help some machines move the layers together. Check that it can handle the label’s thickness and turn around its corners cleanly.
At each corner, stop with the needle down, raise the presser foot and turn the garment without tugging it. Secure the stitching without building up a dense knot of repeated backstitches. On very small labels, leaving thread tails to tie off by hand can reduce bulk.
Remove temporary support and inspect the relaxed result
Take out the basting without catching the shirt’s loops or threads. Remove temporary stabilizer according to its instructions, supporting the seam rather than pulling against it.
Lay the garment flat and leave it unstretched. Check the front and reverse for gathering, loose loops, skipped stitches and sharp thread ends. Then gently handle the shirt as it would move during wear.
Embroidered shirt tags should sit smoothly without needing the surrounding fabric to be pulled taut. A label that cups upward or pulls the shirt inward needs another adjustment before you repeat the method.
If pressing is appropriate, use a pressing cloth and a temperature safe for both materials. Test first and avoid flattening raised embroidery. Pressing can settle a seam, but it will not correct fabric that was stretched during stitching or a label that has shrunk differently.
Adjust the method for the shirt and placement
Lightweight jersey and stretch shirts
Keep the attachment footprint small and avoid unnecessary rows of stitching. A broad, rigid perimeter creates a nonstretching area in an otherwise flexible garment.
For a folded label designed to be caught into a seam, attaching the specified seam allowance can be less restrictive than stitching down every visible edge. Follow the label’s construction, since not every tag is suitable for this method.
On especially thin jersey, consider a softer woven or printed alternative if repeated tests still leave distortion. More stabilizer is not always a better solution.
Woven shirts and neck areas
Woven shirting is usually easier to control, but fine fabrics can still pucker from tight stitches or excessive thread tension. Keep the shirt smooth, not stretched, and avoid adding bulk at an existing seam intersection.
For embroidered shirt tags placed inside a neckline, check comfort as well as appearance. A flat front can hide a rough backing, a stiff corner or an abrasive thread end against the wearer’s skin.
HiLabels’ guide to whether embroidered labels are comfortable against skin covers those construction details. Test the sewn-in sample in its actual position, not just between your fingers.
Fix puckering by correcting the cause
If the seam draws the shirt into small gathers, inspect the threading and stitch balance first. Test a slightly longer stitch or lower upper tension on a sample. Loose loops are not an acceptable trade-off for a flatter surface.
If one side develops a bubble, remove enough stitching to let both layers relax. Reposition and baste before sewing again. Do not pull the excess fabric toward the final corner and stitch it down.
If embroidered shirt tags look smooth before washing but ripple afterward, compare a washed tag with an unwashed spare. Also check whether the shirt shrank or whether a backing changed stiffness. A sewing adjustment cannot fully solve incompatible shrinkage.
When unpicking, work from the label side where practical and cut stitches in small sections. Stop if the shirt fabric begins to snag or ladder. Repeated stitching through the same area can leave permanent damage, especially on fine jersey.
A badly puckered sample is useful information. Resolve it before sewing an entire batch rather than relying on steam to disguise the problem.
Wash-test before repeating the process
Launder the finished sample using the care method intended for the shirt, provided it is also suitable for the label. Let it dry fully before evaluating the result. Damp fabric can appear smoother or more distorted than it will when dry.
Check whether the label remains flat, the edges stay secure and the reverse still feels comfortable. Gently stretch the surrounding knit as it would stretch in wear, without forcing the label itself.
For embroidered shirt tags used across a production run, record the successful needle, thread, stitch length, tension setting and attachment position. Include stabilizer and pressing details if you used them. Those notes make the result easier to repeat, though different fabric batches may still need testing.
Keep the approved sample as a reference for both appearance and handling. A photograph alone will not capture stiffness or scratchiness.
Frequently asked questions
Can I hand-sew a shirt tag to prevent puckering? Yes. Hand-sewing gives you close control over each stitch. Baste the tag onto relaxed fabric, use small stitches appropriate to the label edge and avoid pulling the thread tight enough to gather the shirt.
Is iron-on attachment better than sewing? Not automatically. An iron-on label needs compatible fabric, adhesive and application conditions. Heat can damage some shirts or distort embroidery. Follow the label supplier’s instructions and test laundering durability rather than assuming adhesive will solve puckering.
Do embroidered shirt tags always need stabilizer? No. Stable fabric and a small, flexible tag may sew smoothly with basting alone. Add stabilizer only when testing shows that it improves feeding or support without making the garment uncomfortably stiff.
Should I sew around all four sides? Follow the label’s intended attachment method. A flat sew-on tag may need perimeter stitching, while a folded seam label may attach through its seam allowance. Sewing extra edges can unnecessarily restrict stretch or add bulk.
Choose a label that suits the garment
A smooth attachment starts before the first stitch. Match the label’s size, flexibility and edge finish to the shirt, then approve a sewn and washed sample.
If a lighter construction is a better fit, explore HiLabels’ custom woven label options. Use the online creation tool or upload your artwork, then confirm the dimensions, fold and intended sewing margin before ordering. The right label makes a clean finish easier to achieve.


