Sew On Patches or Iron On? What to Choose
Patch backing may look like a small detail, but it changes how a patch performs, how it feels on the garment, and how long it stays put. The choice between sew on patches and iron-on patches is really a choice between mechanical durability and heat-activated convenience.
For a one-off craft project, a quick repair, or a short-term promotional item, iron-on backing can be the fastest route. For apparel brands, uniforms, workwear, jackets, bags, and anything that will be washed or handled often, sewing is usually the safer long-term choice.
The best answer depends on your fabric, your production process, and the finish you want customers to notice.
Quick answer: sew on or iron on?
Choose sew on patches when the garment needs maximum durability, will be washed often, has a textured or heat-sensitive fabric, or carries a premium brand message. Stitching creates a physical connection between the patch and the garment, so it is less dependent on adhesive performance.
Choose iron-on patches when speed and simplicity matter most. They are easy to apply without sewing equipment and can work well on smooth, heat-tolerant fabrics like cotton and some cotton blends.
If you are unsure, the most practical compromise is often an iron-on patch that is also stitched around the edge. The heat backing helps position the patch cleanly, while the stitching gives it long-term security.
What are sew on patches?
Sew-on patches are patches without a heat-activated adhesive backing, or patches that are intentionally attached by thread even if they have backing. They are secured by hand sewing, machine sewing, or professional embroidery equipment.
This attachment method is strong because it does not rely on glue. The thread holds the patch to the fabric through friction, tension, and repeated stitches around the edge. That makes sew-on patches a natural fit for garments that move, flex, and go through regular laundering.
They are also more flexible from a materials perspective. If a fabric cannot safely handle high heat, sewing gives you a way to apply the patch without risking shine marks, melting, shrinkage, or damage to coatings.
What are iron-on patches?
Iron-on patches include a heat-activated adhesive layer on the back. When heat and pressure are applied, the adhesive softens and bonds to the garment surface. Once it cools, the patch is held in place.
The biggest advantage is convenience. You do not need a sewing machine, and the patch can often be applied in minutes if the fabric is suitable. This makes iron-on backing popular for quick personalization, small batches, casual garments, and DIY projects.
The limitation is that adhesive is affected by fabric texture, heat, moisture, washing, drying, and movement. A patch that bonds well to a smooth cotton tote may not bond reliably to a nylon jacket, ribbed knit, waterproof shell, or heavily textured backpack.
For a deeper look at adhesive-backed options, HiLabels has a separate guide to the best iron-on patches for clothes and when different styles make sense.
Sew on patches vs iron on patches: the core differences
The right choice becomes clearer when you compare the two by performance rather than convenience alone.
| Factor | Sew on patches | Iron-on patches |
|---|---|---|
| Durability | Best for long-term wear, washing, and friction | Good for suitable fabrics, but adhesive can weaken over time |
| Application | Requires hand sewing, machine sewing, or production sewing | Can be applied with heat and pressure |
| Fabric compatibility | Works on many fabrics, including heat-sensitive materials | Best on smooth, heat-tolerant fabrics |
| Appearance | Can show stitching as a design detail or hide it with matching thread | Clean edge with no visible stitches if applied well |
| Repairability | Can be removed or restitched, though needle holes may remain | Can be harder to remove cleanly if adhesive residue remains |
| Production speed | Slower unless handled by an experienced sewer or factory | Faster for small runs and DIY use |
| Best use cases | Uniforms, jackets, bags, denim, workwear, premium apparel | T-shirts, casual items, events, quick personalization, light use |
The key takeaway is simple: iron-on is convenient, sewing is dependable. Neither is universally better. The better option is the one that matches the garment and the job the patch has to do.
Choose based on fabric first
Fabric is the first filter. Even a beautiful patch will disappoint if the backing does not match the material.
Smooth cotton, canvas, and some denim fabrics usually accept iron-on backing better than slick, coated, ribbed, or stretchy fabrics. Heat-sensitive synthetics can be especially risky because the heat needed to activate adhesive may damage the garment before the patch bonds properly.
| Garment or fabric | Better choice | Why it matters |
|---|---|---|
| Cotton T-shirts | Iron-on or sew-on | Smooth cotton can work with adhesive, but sewing lasts longer |
| Denim jackets | Sew-on or iron-on plus stitching | Denim is durable and often worn hard, so thread adds security |
| Canvas totes | Sew-on or iron-on | Both can work, but sewing is better for heavy loads |
| Nylon jackets | Sew-on | Heat can damage or distort some nylon fabrics |
| Waterproof outerwear | Sew-on with care | Heat and adhesive may not bond well to coated surfaces |
| Backpacks | Sew-on | Bags face abrasion, pulling, and outdoor use |
| Caps and curved items | Professional sewing | Curved surfaces make even heat pressure difficult |
| Leather or faux leather | Professional application | Heat and needle holes can both cause issues, so testing matters |
If you are choosing patches for a broader apparel line, it helps to think beyond backing and compare patch type, garment type, and placement together. HiLabels' guide on how to pick the best patches for clothes is a useful next step for that bigger decision.
When sew on patches are the better choice
Sew-on patches are the best choice when the patch is part of the product, not just an add-on. If a customer buys a jacket, hat, uniform, or bag because the patch is part of the design, that patch needs to stay in place through real use.
This is especially important for apparel brands. A patch that lifts at the corners after a few washes can make the entire garment feel lower quality. Stitching helps prevent that problem because the attachment method is visible, durable, and easy to inspect during production.
Sewing also gives you creative control. You can choose contrast stitching for a rugged or handmade look, or match the thread color so the patch edge feels clean and subtle. On jackets, overshirts, workwear, and denim, visible stitching can become part of the brand language.
Sew on patches are usually the stronger choice for:
- Apparel lines where quality perception matters
- Uniforms, clubs, teams, and organizations
- Denim jackets, canvas bags, backpacks, and outerwear
- Products that will be washed often or exposed to friction
- Heat-sensitive fabrics that should not be pressed
- Patches placed on seams, curves, pockets, or structured panels
The tradeoff is time. Sewing takes longer than pressing, and consistent placement requires skill. For a brand, that may mean working with a sewing contractor or building clear production specs for placement, thread color, stitch distance, and edge finish.
When iron-on patches make more sense
Iron-on patches make sense when speed, accessibility, and a clean no-stitch look are the main priorities. They are particularly useful for small batches, events, craft projects, merch drops, and casual garments that will not face heavy wear.
They can also be helpful for testing placement. Applying heat backing can hold the patch flat and centered before additional stitching. For creators and small brands, that can reduce shifting during sewing and help keep the finished patch aligned.
Iron-on backing is a practical choice for:
- Quick customization without sewing equipment
- Smooth cotton or cotton-blend garments
- Lightweight promotional apparel
- DIY repairs and decorative updates
- Short-run merch or event pieces
- Patches that may not need years of heavy laundering
The biggest mistake is assuming iron-on means permanent on every fabric. It does not. Adhesive works best when heat, pressure, fabric texture, and care conditions all cooperate.
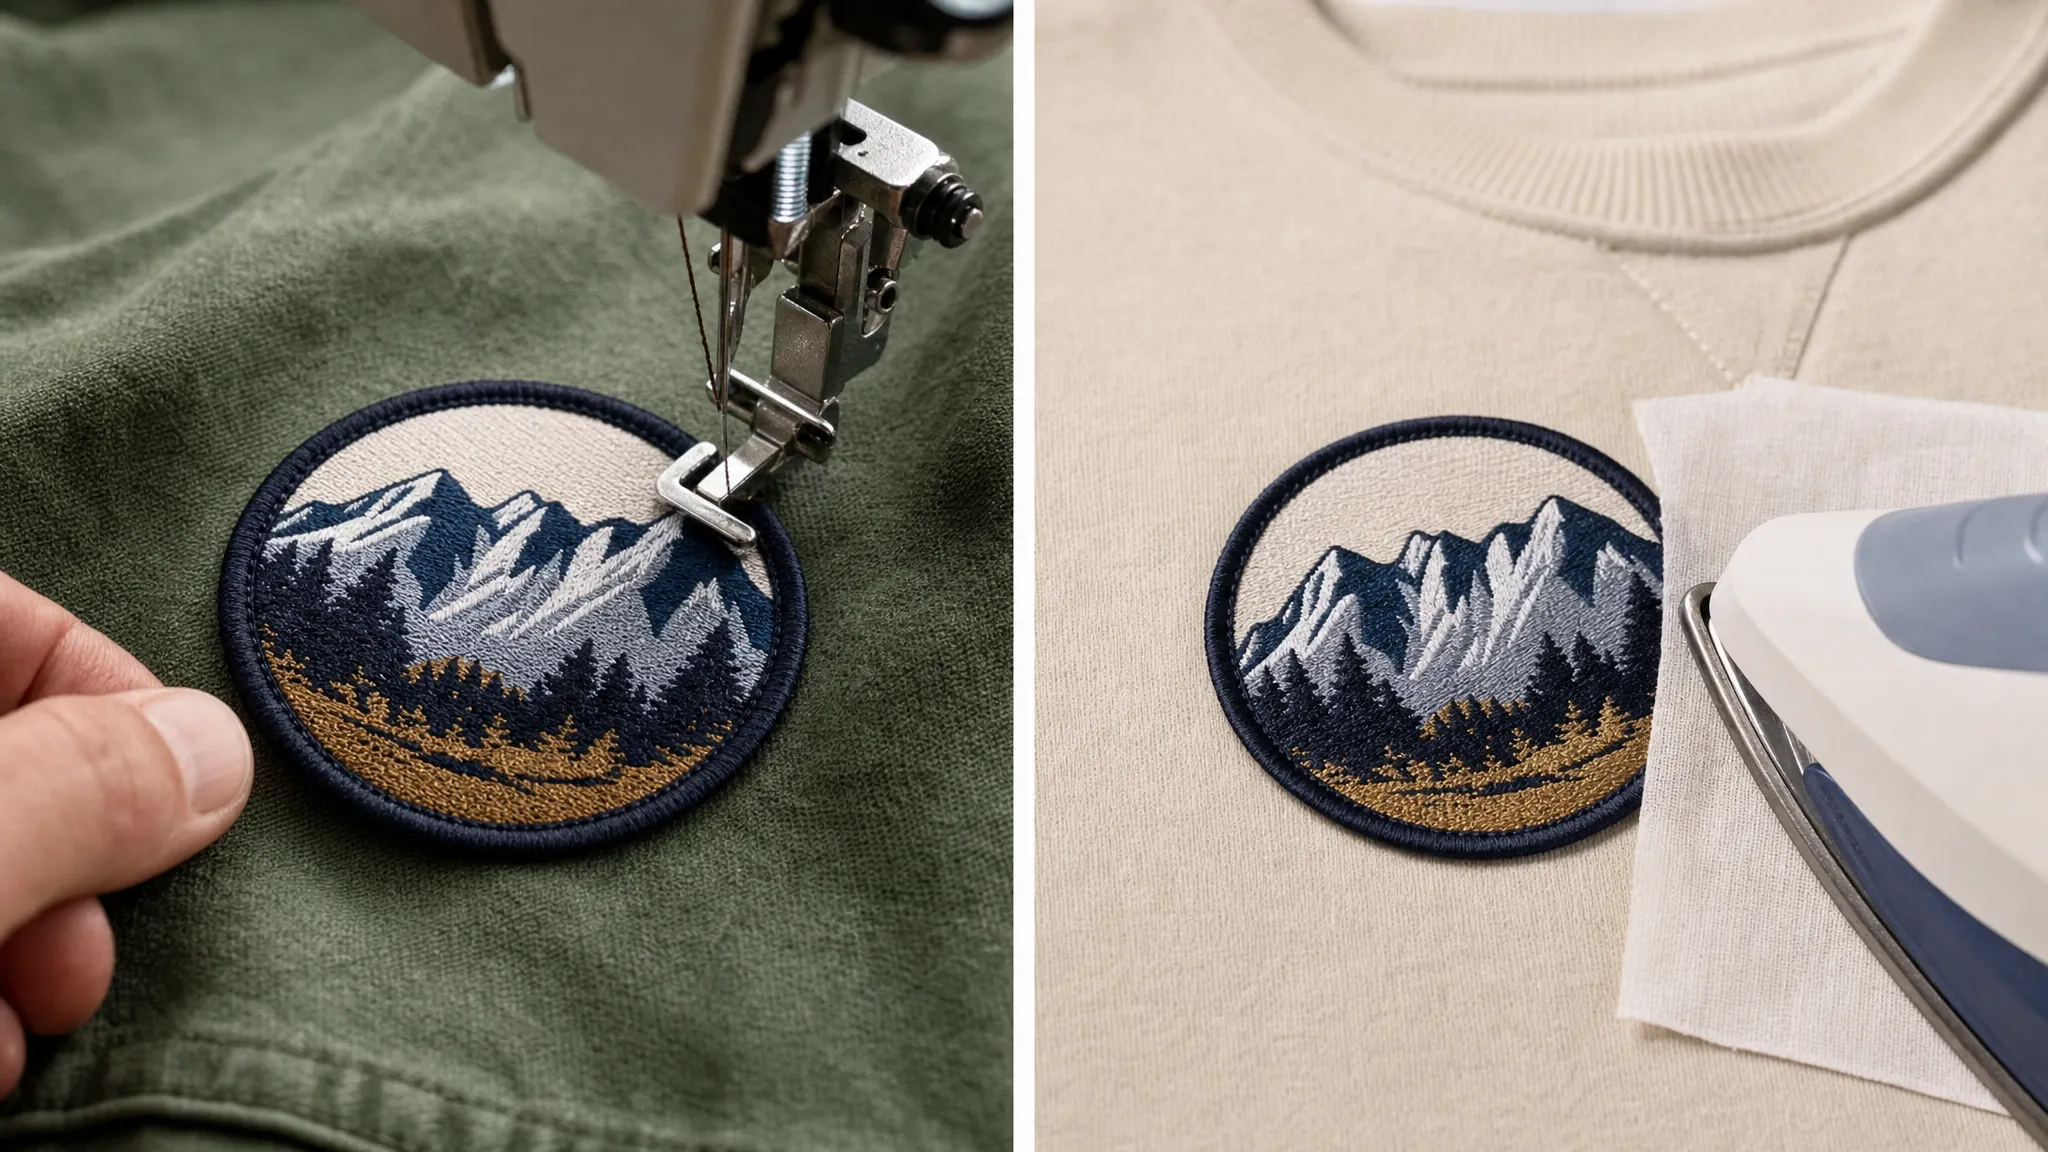
Can you combine iron-on backing with sewing?
Yes, and for many projects this is the best of both worlds. An iron-on backing can hold the patch in place temporarily, which makes it easier to sew around the border accurately. The stitches then become the main long-term attachment method.
This approach is especially useful for denim jackets, tote bags, uniforms, and children’s clothing. The adhesive helps prevent the patch from shifting during application, while the thread protects against lifting edges after washing.
There are two cautions. First, only use heat if the garment can safely handle it. Second, do not assume adhesive positioning replaces proper stitching. If durability is the goal, the stitch line should still be secure and consistent.
Design choices matter as much as backing
Backing is only one part of the decision. Patch construction, artwork detail, color contrast, size, shape, border, and placement all affect the final result.
Woven patches are often a good fit for small text, fine lines, and clean logo detail because the design is created with threads in a tighter, flatter structure. Embroidered patches create a raised, textured look that works well for bold shapes, classic badges, and designs where dimension matters. If you are deciding between those two looks, this comparison of custom embroidered patches vs woven patches explains the visual and practical differences.
Think about the full brand environment too. A patch on a jacket, a woven label inside the collar, a hang tag, packaging, a retail display, and even custom neon signage should feel like parts of the same brand system. Consistent typography, color, and tone make the patch feel intentional rather than decorative afterthought.
For apparel brands, patch placement should also respect how the garment moves. A large patch across a high-stretch area may pull, wrinkle, or feel stiff. A patch on a pocket flap may need extra clearance so the pocket still functions. A patch near a seam may require a smaller border or more careful sewing.
Application tips for better results
Whether you choose sew-on or iron-on, testing is the step that protects your final product. Use the actual garment fabric whenever possible. Similar fabric is helpful, but not always enough, since garment finishes, coatings, dyes, and stretch can affect the result.
For sew-on patches, use a needle and thread that match the garment weight. Heavy denim, canvas, and bags may require stronger thread and a sturdier needle. Thin cotton may need a lighter needle to avoid visible holes or puckering. Keep tension even so the patch lies flat without curling the fabric underneath.
For iron-on patches, always follow the patch supplier’s instructions for heat, pressure, and pressing time. Avoid steam unless instructions allow it. Use a pressing cloth to protect the patch and garment. Let the patch cool fully before testing the bond, since the adhesive needs time to set.
If you are producing more than a few pieces, document the process. A simple production note can include patch placement measurements, thread color, stitch type, pressing conditions, and care instructions. This makes repeat orders more consistent.
Care and washing considerations
Care is where the difference between sewn and ironed becomes most visible. Sewn patches generally tolerate washing better because the thread remains in place even when the garment gets wet. Still, the patch and garment will last longer if washed inside out and dried with moderate heat or air drying when possible.
Iron-on patches need more care because heat and agitation can weaken adhesive over time. Washing inside out, using cooler settings, and avoiding high dryer heat can help preserve the bond. If an edge begins to lift, some patches can be re-pressed, but the result depends on the adhesive, fabric, and how much dirt or lint has entered the bond.
For retail products, care instructions should reflect the most delicate part of the finished garment. If the garment fabric can handle high heat but the patch should not be exposed to it repeatedly, the care guidance should account for the patch.
A simple decision framework
If you are still deciding, use these questions before placing your patch order.
| Question | If yes, lean toward |
|---|---|
| Will the item be washed often? | Sew-on |
| Is the fabric heat-sensitive, coated, slick, or stretchy? | Sew-on |
| Do you need fast DIY application? | Iron-on |
| Is the product a premium retail garment? | Sew-on or iron-on plus stitching |
| Is the patch for a short-term event or promo? | Iron-on |
| Will the patch be on a bag, jacket, cap, or workwear item? | Sew-on |
| Do you want a clean no-stitch appearance? | Iron-on, if the fabric is suitable |
| Do you want the most secure attachment? | Sew-on |
A good rule for brands is this: if a failed patch would create a customer service issue, sew it on. If the patch is decorative, low-risk, and placed on a compatible fabric, iron-on may be enough.
Common mistakes to avoid
One common mistake is choosing backing before choosing the garment. Start with the fabric and the use case, then select the backing. A patch that works perfectly on a cotton hoodie may fail on a coated windbreaker.
Another mistake is making the patch too large for the placement area. Large patches can look great on the back of a jacket, but they may feel stiff on a T-shirt or distort on a curved cap. Scale matters.
Brands also sometimes overlook edge security. Even with iron-on backing, a stitch around the edge can dramatically improve confidence, especially for garments that will be sold, washed, and worn often.
Finally, do not skip a test wash. A patch can look perfect on day one and reveal problems only after laundering. Testing helps you catch edge lifting, puckering, dye transfer, or stiffness before a full production run.
Frequently Asked Questions
Are sew on patches more durable than iron-on patches? Yes, in most long-term apparel applications. Sew-on patches rely on thread rather than adhesive, so they usually perform better through repeated washing, friction, and movement.
Can an iron-on patch also be sewn on? Often, yes. Many people use heat backing to position the patch, then sew around the edge for extra durability. Always confirm that the garment can safely handle heat first.
Which patch type is best for jackets? Sew-on patches are usually best for jackets, especially denim, canvas, workwear, and outerwear. Iron-on can work on some jacket fabrics, but heat-sensitive or coated fabrics should be treated carefully.
Do sew-on patches damage clothing? Sewing creates needle holes, so removal may leave small marks, especially on leather, delicate fabrics, or tightly woven materials. On sturdy fabrics like denim and canvas, this is usually less noticeable.
Are iron-on patches washable? Many are washable when applied correctly to suitable fabric, but they still need proper care. Washing inside out, using cooler settings, and avoiding high dryer heat can help the adhesive last longer.
What is best for a clothing brand, sew-on or iron-on? For most retail apparel, sew-on or iron-on plus stitching is the safer choice. It supports better durability and helps the finished garment feel more professionally made.
Create patches that match your apparel goals
The right patch backing depends on how the garment will be worn, washed, sold, and experienced. Choose sew-on for durability and premium finish. Choose iron-on for speed and simplicity on compatible fabrics. Combine both when you want easier placement and stronger long-term hold.
HiLabels helps brands and makers create high-quality custom patches, woven labels, ribbons, zipper pulls, and care labels with a user-friendly online ordering process. With decades of experience and strong craftsmanship, the team can help you turn your artwork into durable branding details that fit your apparel line, not just your logo file.


